
Today, we will show you Put a Key Back on a Laptop Keyboard. Regardless of whether you’ve attempted to reattach your key and failed, don’t surrender trust. You can reattach a key on your keyboard. All you really want are patience, concentration, and that annoying detached key. This How to Put a Key Back on a Laptop Keyboard teaches you how to reattach any key on your laptop or desktop computer’s keyboard.
How to Put a Key Back on a Laptop Keyboard
Not all laptop keyboards are equal, and certain keyboards are constructed uniquely in contrast to different keyboards. However, traditionally a laptop keyboard is shrouded in flat, plastic keycaps with those familiar letters, numbers, and images.
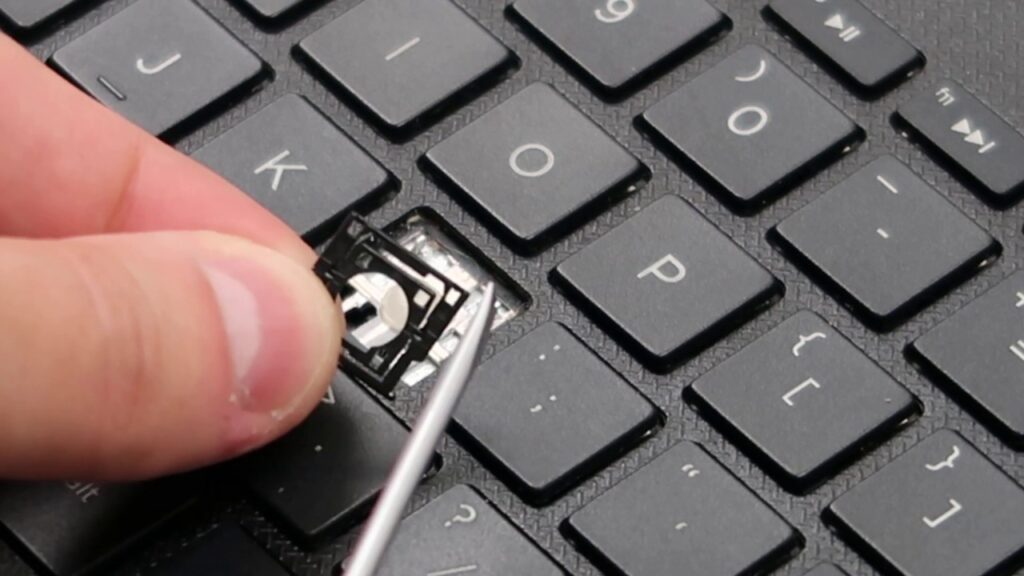
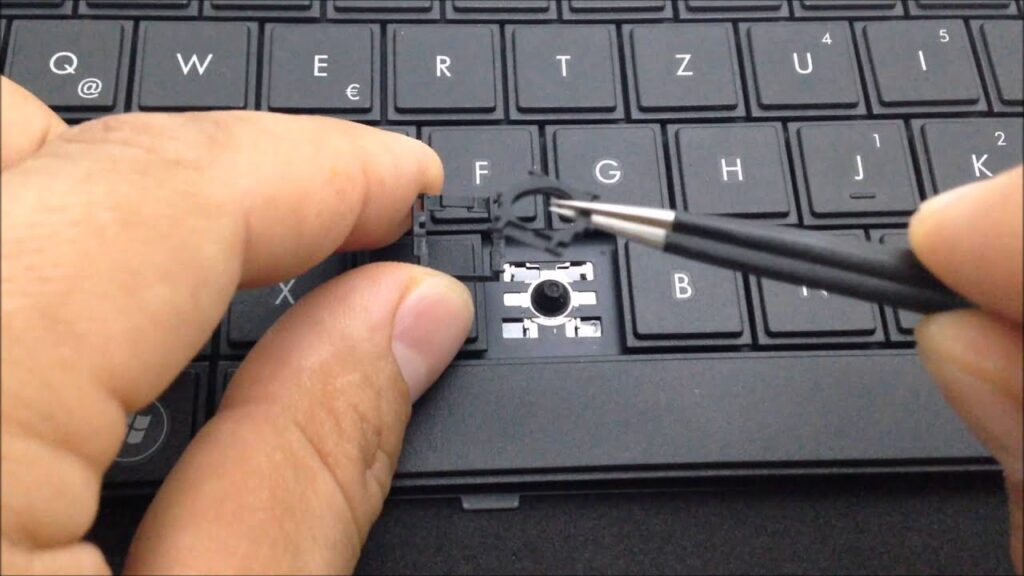
Different parts of a key can break aside from the keycap How to Put a Key Back on a Laptop Keyboard, however a keycap snapping off your keyboard is the most common laptop keyboard issue, so assuming you have a wrecked key, chances are the keycap came off.
These keycaps get into a smidgen of plastic known as the keycap retainer. These are usually small, plastic circles or squares which lock the keycap into place.
Examine the back of the key for damage
Surrender the key to make sure that the part of the key that latches onto the keyboard is still in place. You ought to see a small plastic piece that will attach back onto the keyboard base Xbox. Compare the key to the base of the keyboard where you plan to reattach it to make sure that this latch is available. In the event that it isn’t, then you may require a replacement key.
Individual replacement keys can be purchased online.
There are a variety of laptop keyboards available, and that means the reattachment steps may contrast marginally than what you see here.
Know the anatomy of a key
Most keyboard keys are contained three parts: the key cap (which is the actual key), the key carriage (a flat piece of plastic on which the key sits), and the key pad (a piece of elastic that sits between the key and the carriage).
Fixing a messed up keycap
Start by first embedding the key retainer into the laptop. Assuming you have a key pad, we propose embedding it after the retainer is set in place to make things easier How to Put a Key Back on a Laptop Keyboard. Once the retainer is embedded, it ought to lie flat and have the option to flex.
Once the above two stages are finished, position the key cap over the retainer in the legitimate orientation and press down gently. The key ought to snap onto the retainer. On the off chance that the key doesn’t look right, take a stab at pushing down on all edges of the key to make sure all clasps are snapped into place. Once snapped in, test the key and check whether it works again.
Keys With a Single Retainer
Examine the key post on the keyboard for its retainer. On a standard keyboard, this is a solitary round or square piece of plastic that fits around the key post like a collar. On a laptop or low-profile keyboard, there ought to be two retainers pivoted together, which requires an alternate cycle. On the off chance that you don’t see a retainer at all How to Put a Key Back on a Laptop Keyboard, look on the underside of the key or on the floor to track down it.
Components Holding Keys on a Laptop
Most laptops, including Apple items, utilize similar components to get the keys on a keyboard. However, Chromebooks and laptops with mechanical keyboards may utilize an alternate strategy.
Can HP Laptop Keys Be Removed?
Utilizing the plastic removal tool How to Put a Key Back on a Laptop Keyboard, pry at least different sides up from the key to eliminate it. Under the key, there are two square black pieces. It is conceivable that the back of the key piece has a smaller piece stuck there.