
Today, we will show you How to Turn Your Raspberry Pi into a Video Conferencing Station. Post-lockdown, with working and tutoring from home as a matter of normal, more individuals are turning toward video conferencing as a way to stay in contact and finish things.
Tools like Google Meet, Skype and Zoom mean we can stay in contact with individuals outside the bounds of our home, across urban areas, time regions How to Turn Your Raspberry Pi into a Video Conferencing Station, and even nations, making the world smaller and allowing for far off collaboration.
Assuming that you’re searching for another great Raspberry Pi project, I ask you to attempt this one. This tutorial shows you how to turn your Raspberry PI into a video conferencing station.
How to Turn Your Raspberry Pi into a Video Conferencing Station
During circumstances such as the present, having the option to make a videoconference from home has become something normal, yet entirely frequently necessary. There are not a couple of laborers and even understudies who have had to get hold of a webcam to have the option to attend to their work and educational necessities Activate as Primary PS5, and consequently on the off chance that you have a Raspberry Pi gathering dust in a drawer, we will show you how you can turn it into a videoconference station basically, rapidly and putting away minimal expenditure.
The idea of this task is to dedicate a Raspberry Pi and certain accessories only to mount a sort of video meeting station, so you don’t have to involve your PC or different gadgets for it. With tools, for example, Google Meet or Zoom and obviously with the assistance of a Raspberry Pi and a webcam you will actually want to stay in contact with individuals anywhere on the planet, whether for work or study.
Setting up your TrueConf account
To utilize video conferencing on your Raspberry Pi in a group with TrueConf Room application, you really want to sign in with either your TrueConf Server account or TrueConf Online cloud administration. In the main case, you can demand your login details from the administrator of your video conferencing server. To interface with the cloud administration, create an account on our site.
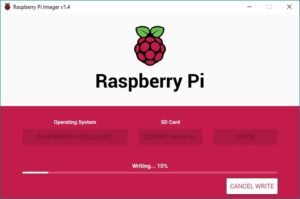
Startup and initial arrangement of the operating framework
Embed the memory card into the relating opening of the single-board PC. Then, at that point, you should associate:
power supply in the USB Type-C connector (don’t associate with the power yet)
monitor with miniature HDMI – HDMI cable to HDMI0 connector (audio yield is upheld)
network cable into the Ethernet port (utilizing the underlying Wi-Fi is also conceivable)
keyboard, mouse, webcam, and mouthpiece How to Turn Your Raspberry Pi into a Video Conferencing Station (if necessary) to available USB ports.
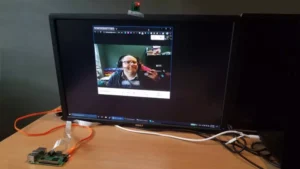
Interfacing a monitor, keyboard, and mouse
I normally utilize my Raspberry Pis headless as a server. In any case, telecommuting, and involving Raspberry Pi as your primary PC, you will require a monitor, keyboard, and mouse.
Associating a keyboard and a mouse to your Raspberry Pi simply includes connecting them, although you ought to probably make sure you plug them into the USB 2 rather than the USB 3 attachments. You can tell these apart by their variety: USB 3 attachments have blue ‘tongues’ How to Turn Your Raspberry Pi into a Video Conferencing Station, while USB 2 attachments have black ones.
Can you utilize a webcam with Raspberry Pi?
Rather than utilizing the Raspberry Pi camera module, you can utilize a standard USB webcam to take pictures and video on the Raspberry Pi. Note that the quality and configurability of the camera module is profoundly better than a standard USB webcam.
Running Zoom on the Raspberry Pi
With your Raspberry Pi turned on and booted into a Linux distro like Ubuntu or Raspberry Pi OS, feel free to interface all of your webcam, mouthpiece How to Turn Your Raspberry Pi into a Video Conferencing Station, and headset.
Then, connect your receiver. A standard USB mouthpiece is the easiest choice. In the event that you’re utilizing a USB mic, basically plug your audio capture gadget into a free USB port on the Pi. For a XLR mic How to Turn Your Raspberry Pi into a Video Conferencing Station, you’ll have to associate the XLR mouthpiece first to a USB interface and then to the Pi. In the event that you’re utilizing a headset with an integrated receiver, skirt this progression.